Creating and Updating Your Brightspace Schedule
To create a Pacing & Progress Tool Schedule for each of your courses:
-
Begin by logging into Brightspace.
-
Select the course that you wish to build a schedule for.
Please note: If your teacher has not yet built a pacing guide for your course, you will be unable to create your schedule. Please contact your teacher for more information in this case.
-
Click Pacing & Progress Tool in the Navigation Bar.

-
You will be taken to the Pacing & Progress Tool landing page. To begin, you will need to select your start date and completion date.
Here are some suggested dates, however you can choose any start and end date:
You may create your schedule with any start and finish date as long as the duration does not exceed 365 days.
Once you’ve chosen your dates, click Continue.
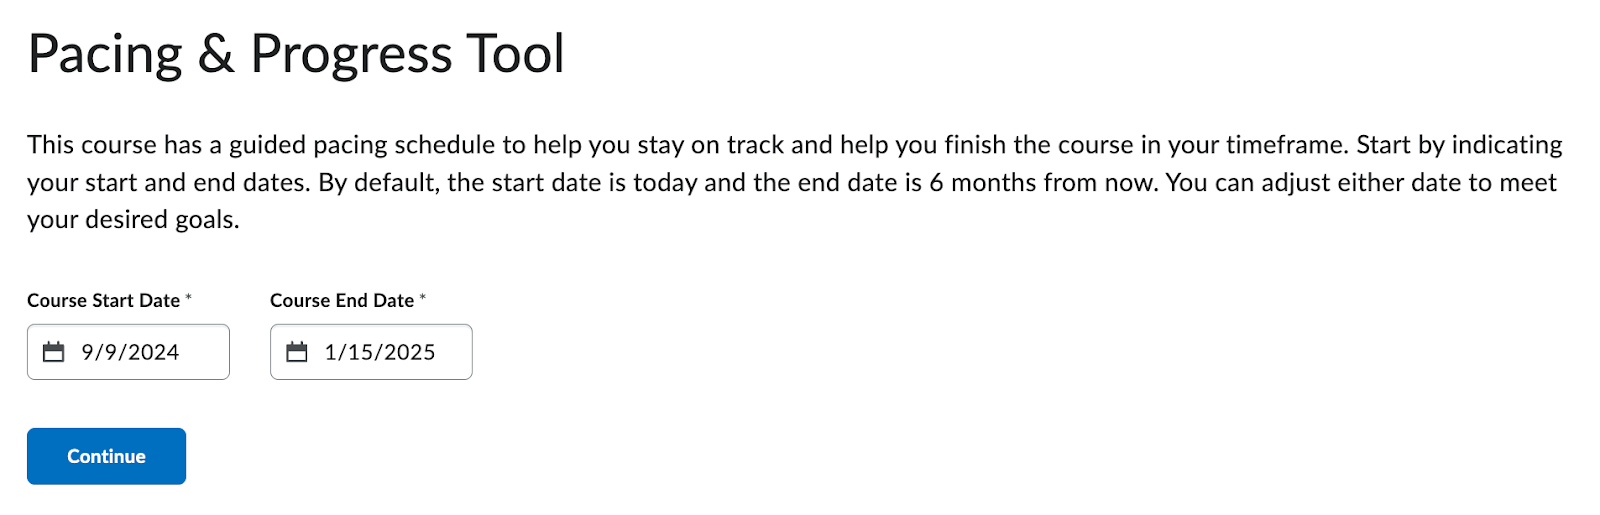
Please note: your Course End Date can be edited after this initial selection. At this time, the Course Start Date cannot be changed. Please ensure that you are choosing a date that best reflects your goals of starting.
You will be asked to confirm you are ready to proceed. If your dates are correct, click Create Schedule. You will be taken to a page that outlines your course schedule!
Updating Your Schedule
There is flexibility built into the scheduler tool, as it is designed to assist you in your planning and support you in your course progress.
There may be times throughout the year where you need to adjust a date on a specific assignment, or your final course end date.
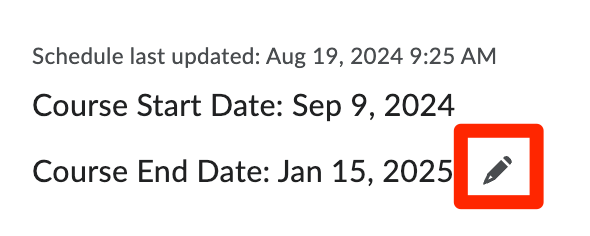
Course End Date
-
To adjust your final course end date, click the pencil icon to the right of the Course End Date at the top of your schedule.
-
Here you will be able to select a different course end date. Please remember that you will not be able to select a date that is more than 365 days from your start date. Once you have chosen your new date, click Save at the bottom of the window.
-
The tool will now repopulate your Suggested Due Dates for assignments based on your new Course End Date.
Specific Assignment Dates
There are two different ways in which you can adjust your assignment due dates to fit your schedule.
Option 1: Individually
-
Individually by clicking the pencil icon next to the Suggested Due Date of the assignment you wish to move.
-
You will then be prompted to select a new date for when you plan to complete the assignment. Click Save at the bottom of the window.
-
Your scheduler will adjust to the new dates, including your progress wheel.

Please note: Due dates created by teachers in specific courses such as CC+ courses and synchronous classes should not be changed in the scheduler. In the case where a scheduler due date and assignment due date disagree, the due date set by the instructor takes priority.
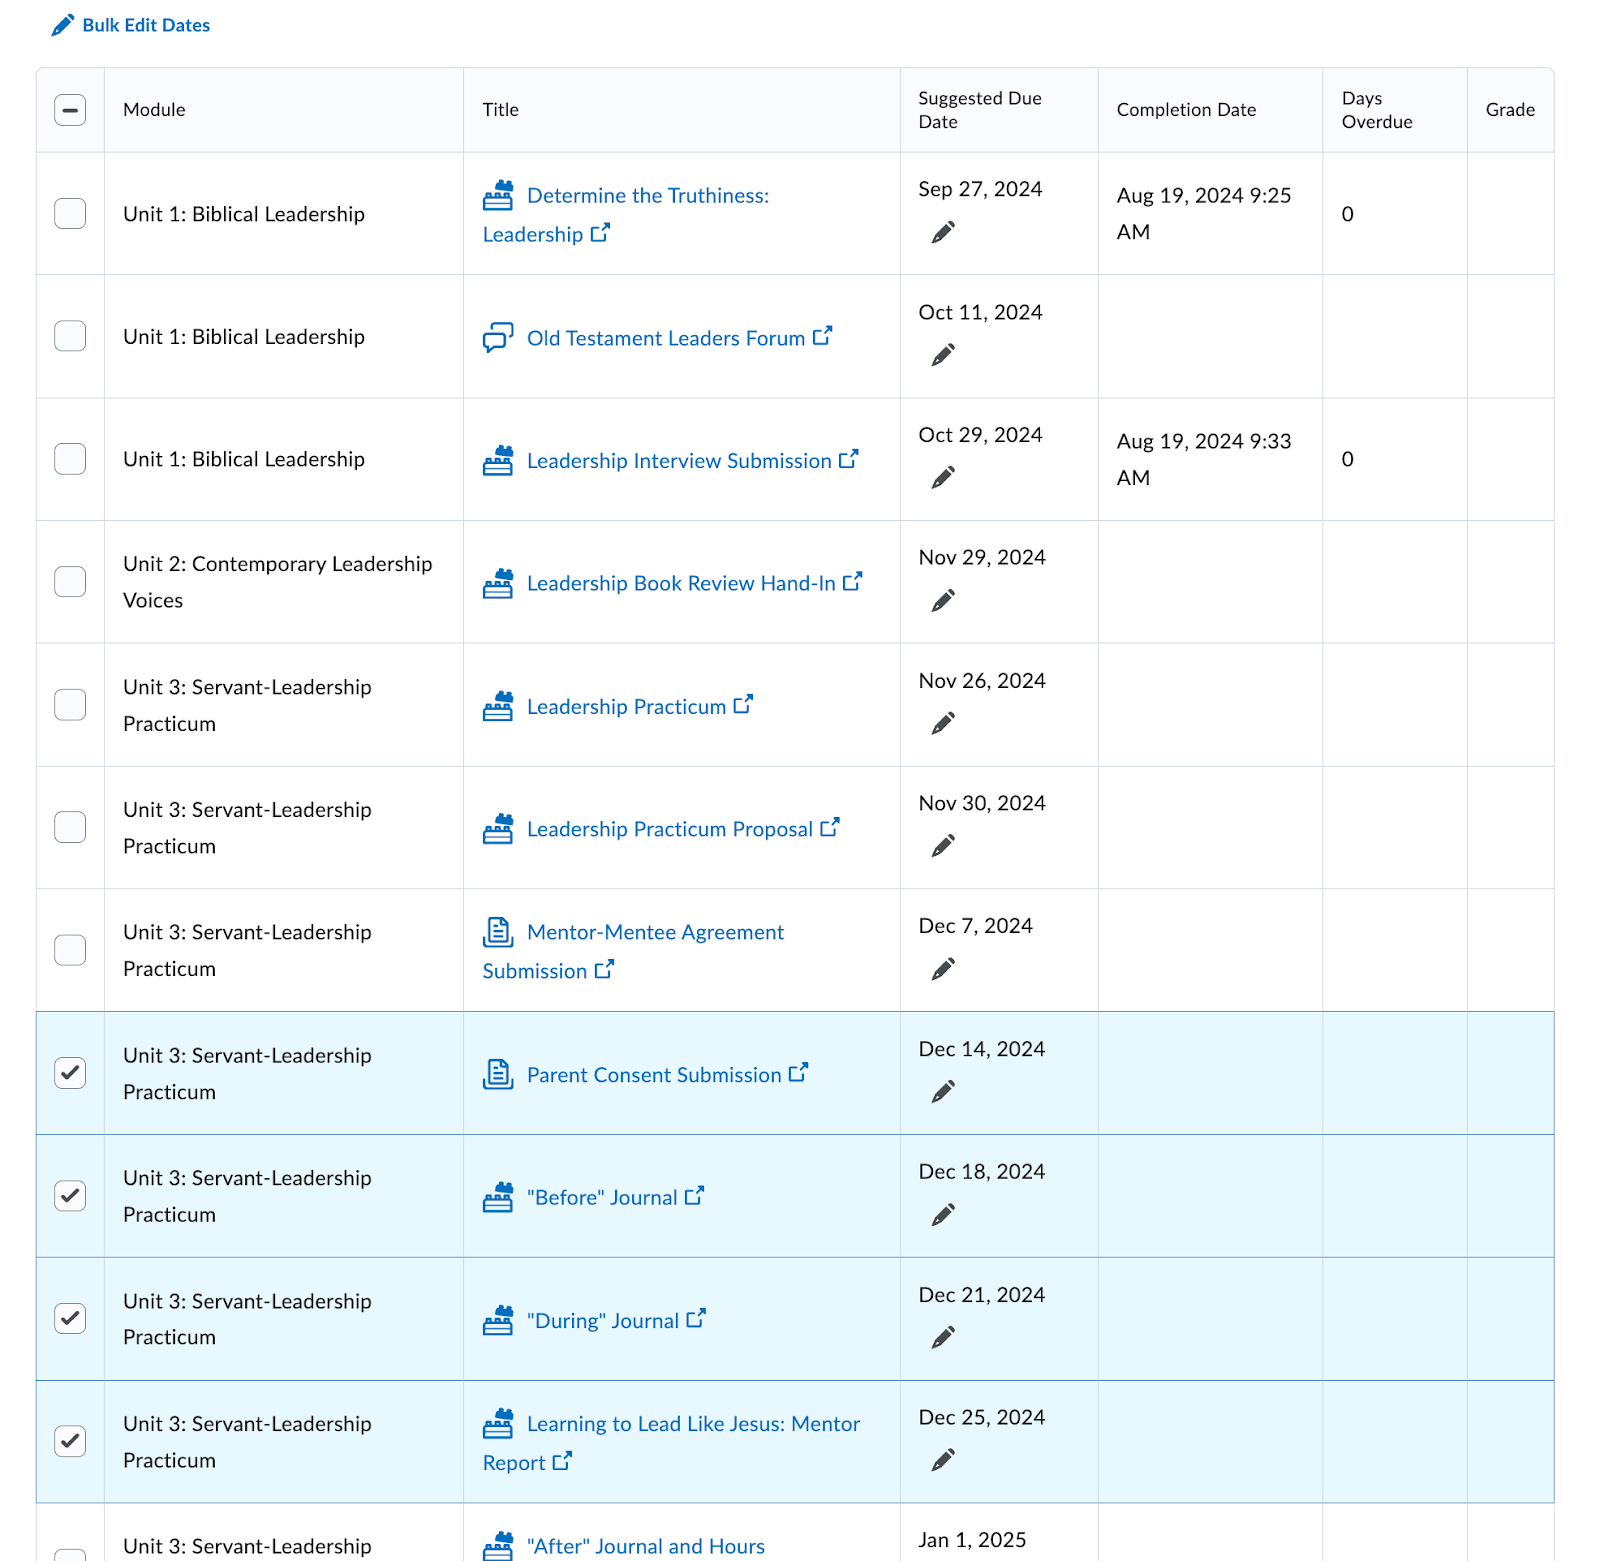
Option 2: Bulk Edit
Are you going away for Christmas holidays or maybe Spring Break? Consider bulk editing your due dates during that time frame.
-
Select the items you wish to change by clicking the checkbox to the left of the items.
-
Then click the Bulk Edit Dates located at the top left of the scheduler items.
-
You will be taken to a window where you can edit all of the Suggested Due Dates for those items. Change the dates accordingly and click the blue Save button at the bottom of the window. If you have chosen a date that is outside of your Course End Date, it will populate as an error and flagged for change.

Once all new dates are saved, click Close to then be redirected to your schedule.